In Swift To-Do List, you can can color your tasks based on Priority, Type, Status, Context or Assigned To..
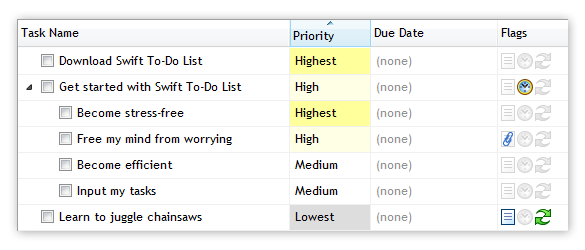
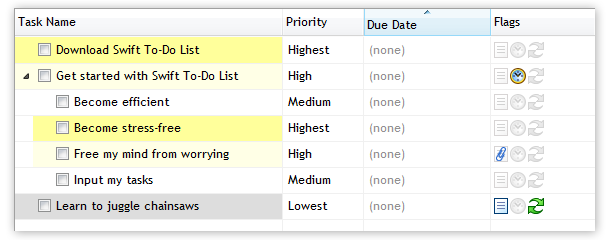
Additionally, 3 different modes are supported when coloring tasks (column, task name, whole row). That’s a lot of combinations! So let me give you an example for coloring by Priority – I will show how each of the modes looks like:
1. Color inside the Priority column:
2. Color Task Names (based on Priority):
3. Color whole rows (based on priority):
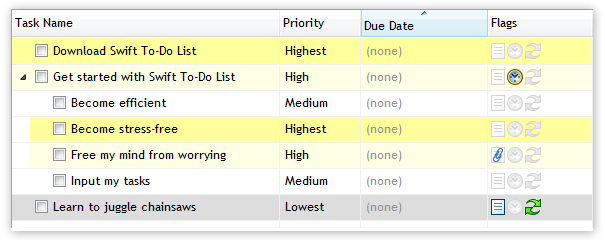
By default, Swift To-Do List uses colors only in the Priority column, as shown in the first example. But you can customize and use colors much more – and in this post, you will learn all about it.
How to enable or customize colors
To enable or customize the colors, use the Manage menu:
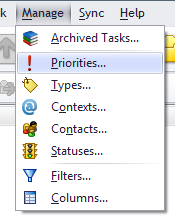
Let’s say that we want to customize coloring by Type, so we will click the Type menu item. The following Manage Types window will be shown:
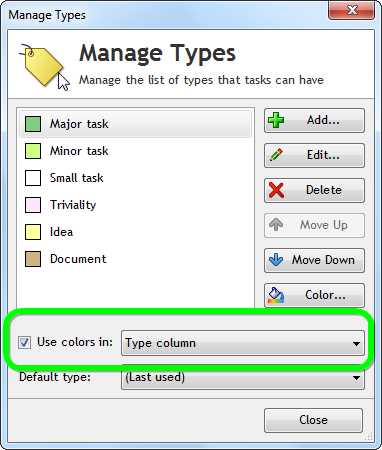
Very similar window would be shown for Priorities, Statuses, Contexts or Contacts (Assigned To). It works the same.
In this manage window, you can do 3 key things:
- Enable or disable colors, by clicking the checkbox, as shown in the screenshot above.
- Choose the color mode (Column/Task Name/Whole Row), as explained at the beginning of this post.
- Change the colors for individual items. To do that, select an item, then click the Color button on the right.
Please note that for obvious reasons, you can’t use the Whole Row or Task Name coloring mode for two or more fields at once – e.g. both Priority and Type can’t color the Task Name.
However, the Column coloring mode can be combined with any other modes of other fields – e.g. Priority can color task names (or even whole rows), and at the same time, Type can color the Type column.
Also please note, that done tasks are always displayed in gray text with no color highlights.
Your coloring customizations are of course automatically saved and remembered, even after restarting the program.
Coloring Due Dates and Start Dates
Due Dates and Start Dates can be also additionally colored in the task-view. This is how it looks in action:
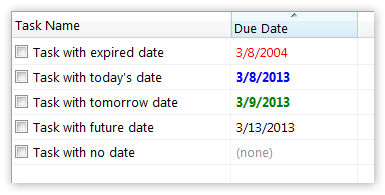
To configure this, use menu File – Options, and in the Options window, go to the Task-View section.:
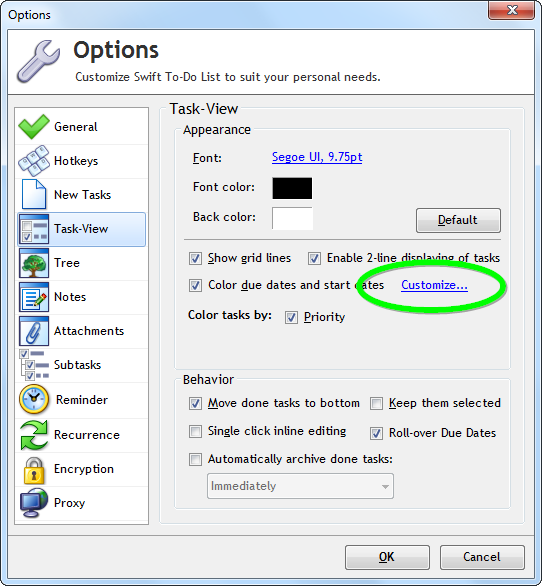
There, make sure “Color due dates and start dates” is checked, and click Customize upon this checkbox. This will display the following window:
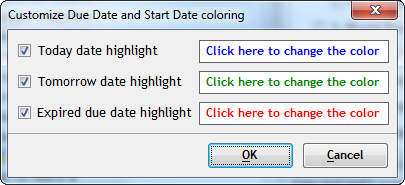
As you can see, today, tomorrow and expired dates can be highlighted using a color of your choosing. The “today” and “tomorrow” dates are also displayed in bold for extra highlight.
Bonus tip for Ultimate owners: Creating a “Color” column
This is a fun trick. If you want to color your tasks yourself, and not based on Priorities/Types/Contexts/Statuses/Assignees, you will love this -
If you own the Ultimate edition, and don’t use the Context or Type column, you can rename it to “Color”. To do that, use menu Manage – Columns. In the window shown, select and enable the Context or Type column, then click the Rename button. Type in “Color” and confirm.
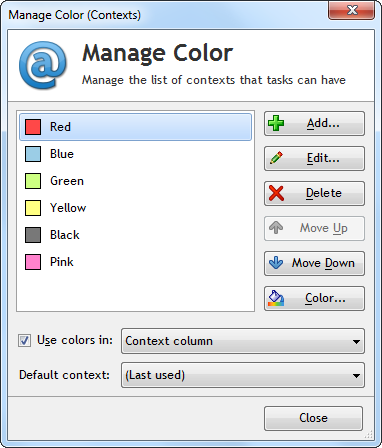
Now, use menu Manage – Colors and rename all the contexts to color names. Then set them the appropriate color. As an example, after customizing, it can look like this:
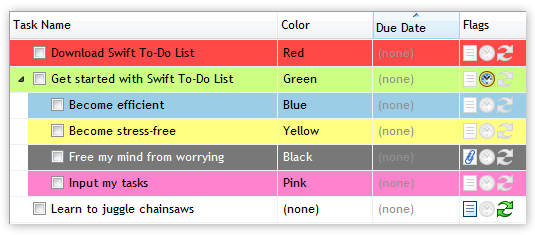
And now, here’s the fun part! From now on, you will have a new “Color” column that you can use in Swift To-Do List. For each of your tasks, you can set an optional color. The result can look something like this:
Any questions or comments?
So, that’s it. Now you should be a master when it comes to using colors in Swift To-Do List.
We have a nifty little comments box at the bottom of this page – if you have a question or a comment, don’t hesitate to write something into it and click Submit comment! I will be happy to reply to all comments.



Thanks Jiri . This was really useful. More like this welcome anytime.